
How to Replace Yamaha Grizzly 450 Starter Motor
Firstly, you will need to source a replacement Starter Motor, which can be found by Clicking Here
Replacing the starter motor on your Yamaha Grizzly 450 is a task that requires attention to detail and the right tools. Here’s a step-by-step guide to help you through the process:
Tools and Materials Needed:
- New starter motor compatible with your Yamaha Grizzly 450 model
- Socket wrench set
- Allen wrench set
- Screwdrivers (both Phillips and flathead)
- Torque wrench
- Clean rags
- Service manual (optional but highly recommended)
Step 1: Preparation
- Ensure your ATV is turned off and parked on a flat, stable surface.
- Allow the engine to cool down if it has been recently running.
- Disconnect the battery to prevent any electrical mishaps during the replacement process.
- Familiarize yourself with the location of the starter motor on your Yamaha Grizzly 450. It’s typically located on the engine casing.
Step 2: Remove Body Panels (if necessary)
- Depending on your ATV’s model year and design, you may need to remove some body panels or covers to access the starter motor.
- Use the appropriate tools to remove the necessary body panels or covers, following the instructions in your service manual if available.
Step 3: Disconnect Electrical Connections
- Locate the electrical connections attached to the starter motor.
- Carefully disconnect these electrical connections, ensuring you note their positions or take a photo for reference during reassembly.
Step 4: Remove Mounting Bolts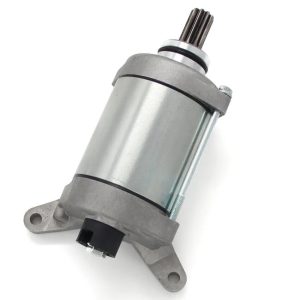
- Once you have access to the starter motor, locate the mounting bolts securing it in place.
- Use the appropriate tools to loosen and remove these mounting bolts, ensuring you keep track of them for reassembly.
Step 5: Remove Starter Motor
- With the mounting bolts removed, gently pull the starter motor away from the engine.
- Take care not to damage any surrounding components as you remove the starter motor.
Step 6: Install New Starter Motor
- Position the new starter motor in place, aligning it properly with the mounting holes.
- Secure the new starter motor in place using the mounting bolts removed earlier. Tighten them securely.
Step 7: Reconnect Electrical Connections
- Reconnect the electrical connections to the new starter motor, ensuring all connections are secure and properly seated.
Step 8: Reassemble Body Panels (if removed)
- If you removed any body panels or covers to access the starter motor, carefully reassemble them onto the ATV using the appropriate bolts or fasteners.
Step 9: Final Checks
- Double-check all connections and fasteners to ensure everything is secure.
- Reconnect the battery.
- Start your ATV and verify that the new starter motor is functioning properly.
Additional Tips:
- Refer to your ATV’s service manual for specific instructions and torque values.
- Take your time and work carefully to avoid damaging any components.
- If you’re unsure about any step, don’t hesitate to consult with a professional mechanic or refer to online tutorials/resources.
By following these steps carefully, you should be able to successfully replace the starter motor on your Yamaha Grizzly 450 and ensure your ATV starts reliably.
